
remove vm in parallels desktop 20 for macos
To remove a virtual machine (VM) in Parallels Desktop 20 for macOS, follow these straightforward steps:
Step-by-Step Guide to Remove a VM
-
Launch Parallels Desktop: Open the Parallels Desktop application on your Mac.
-
Access the Control Center: Click on the Parallels icon in the macOS menu bar and select the “Control Center” from the dropdown menu.
-
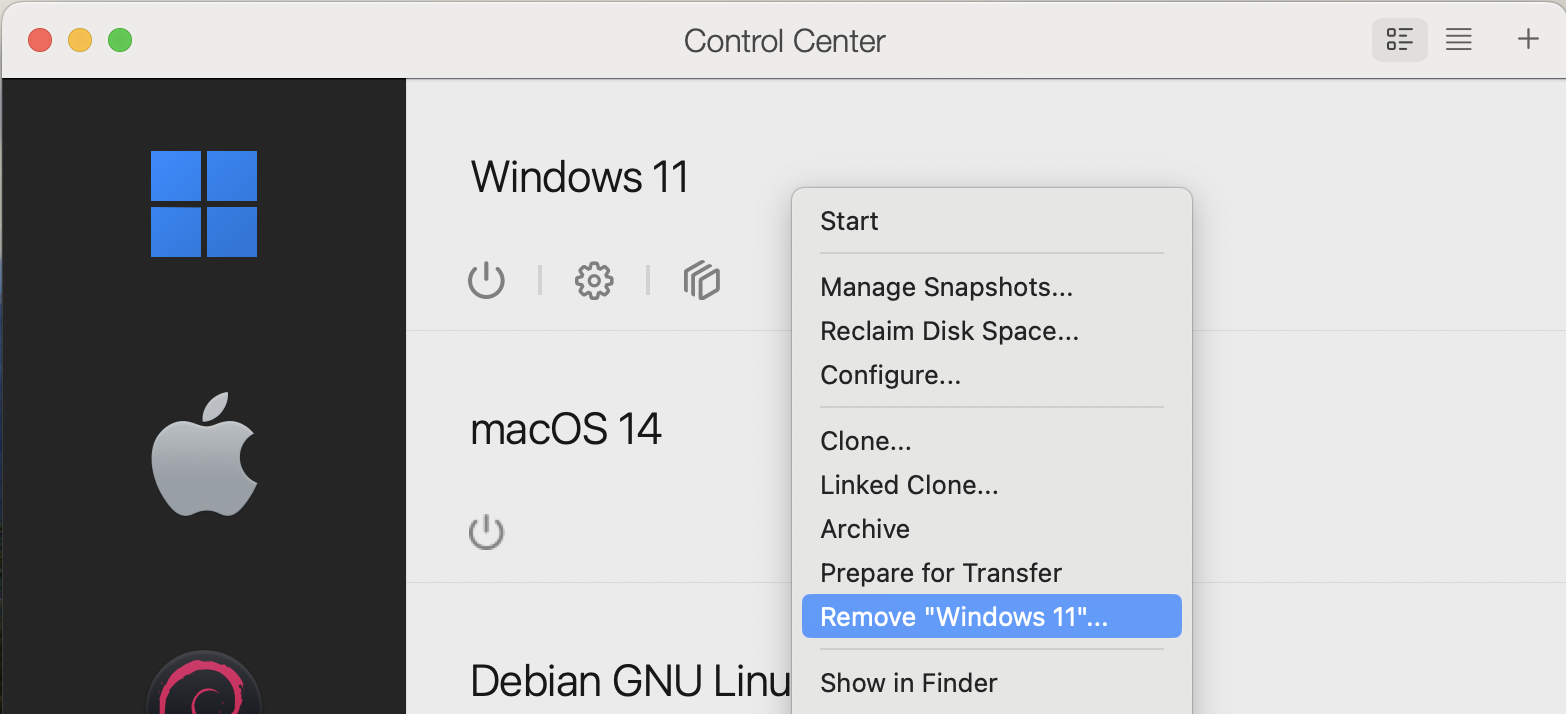
Select the Virtual Machine: In the Control Center, find the virtual machine you wish to remove.
-
Delete the VM:
- Right-click Method: Right-click on the VM's name and select “Remove '[VM Name]'” from the context menu.
- Menu Option Method: Alternatively, you can select the VM and then click on the “File” menu in the top bar and choose “Remove”.
-
Confirm Deletion: A prompt may appear asking if you want to keep the VM files or delete them permanently. Choose according to your needs:
- Select “Keep Files” if you think you may need the data later.
- Choose “Delete” if you want to remove everything associated with that VM.
For a detailed reference on this process, see the official Parallels support documentation here: Remove a virtual machine in Parallels Desktop for Mac.
By following these instructions, you can efficiently remove any unwanted virtual machines in Prallels Desktop 20 on your macOS.
Sources

Related Questions
Work fast from anywhere
Stay up to date and move work forward with BrutusAI on macOS/iOS/web & android. Download the app today.